
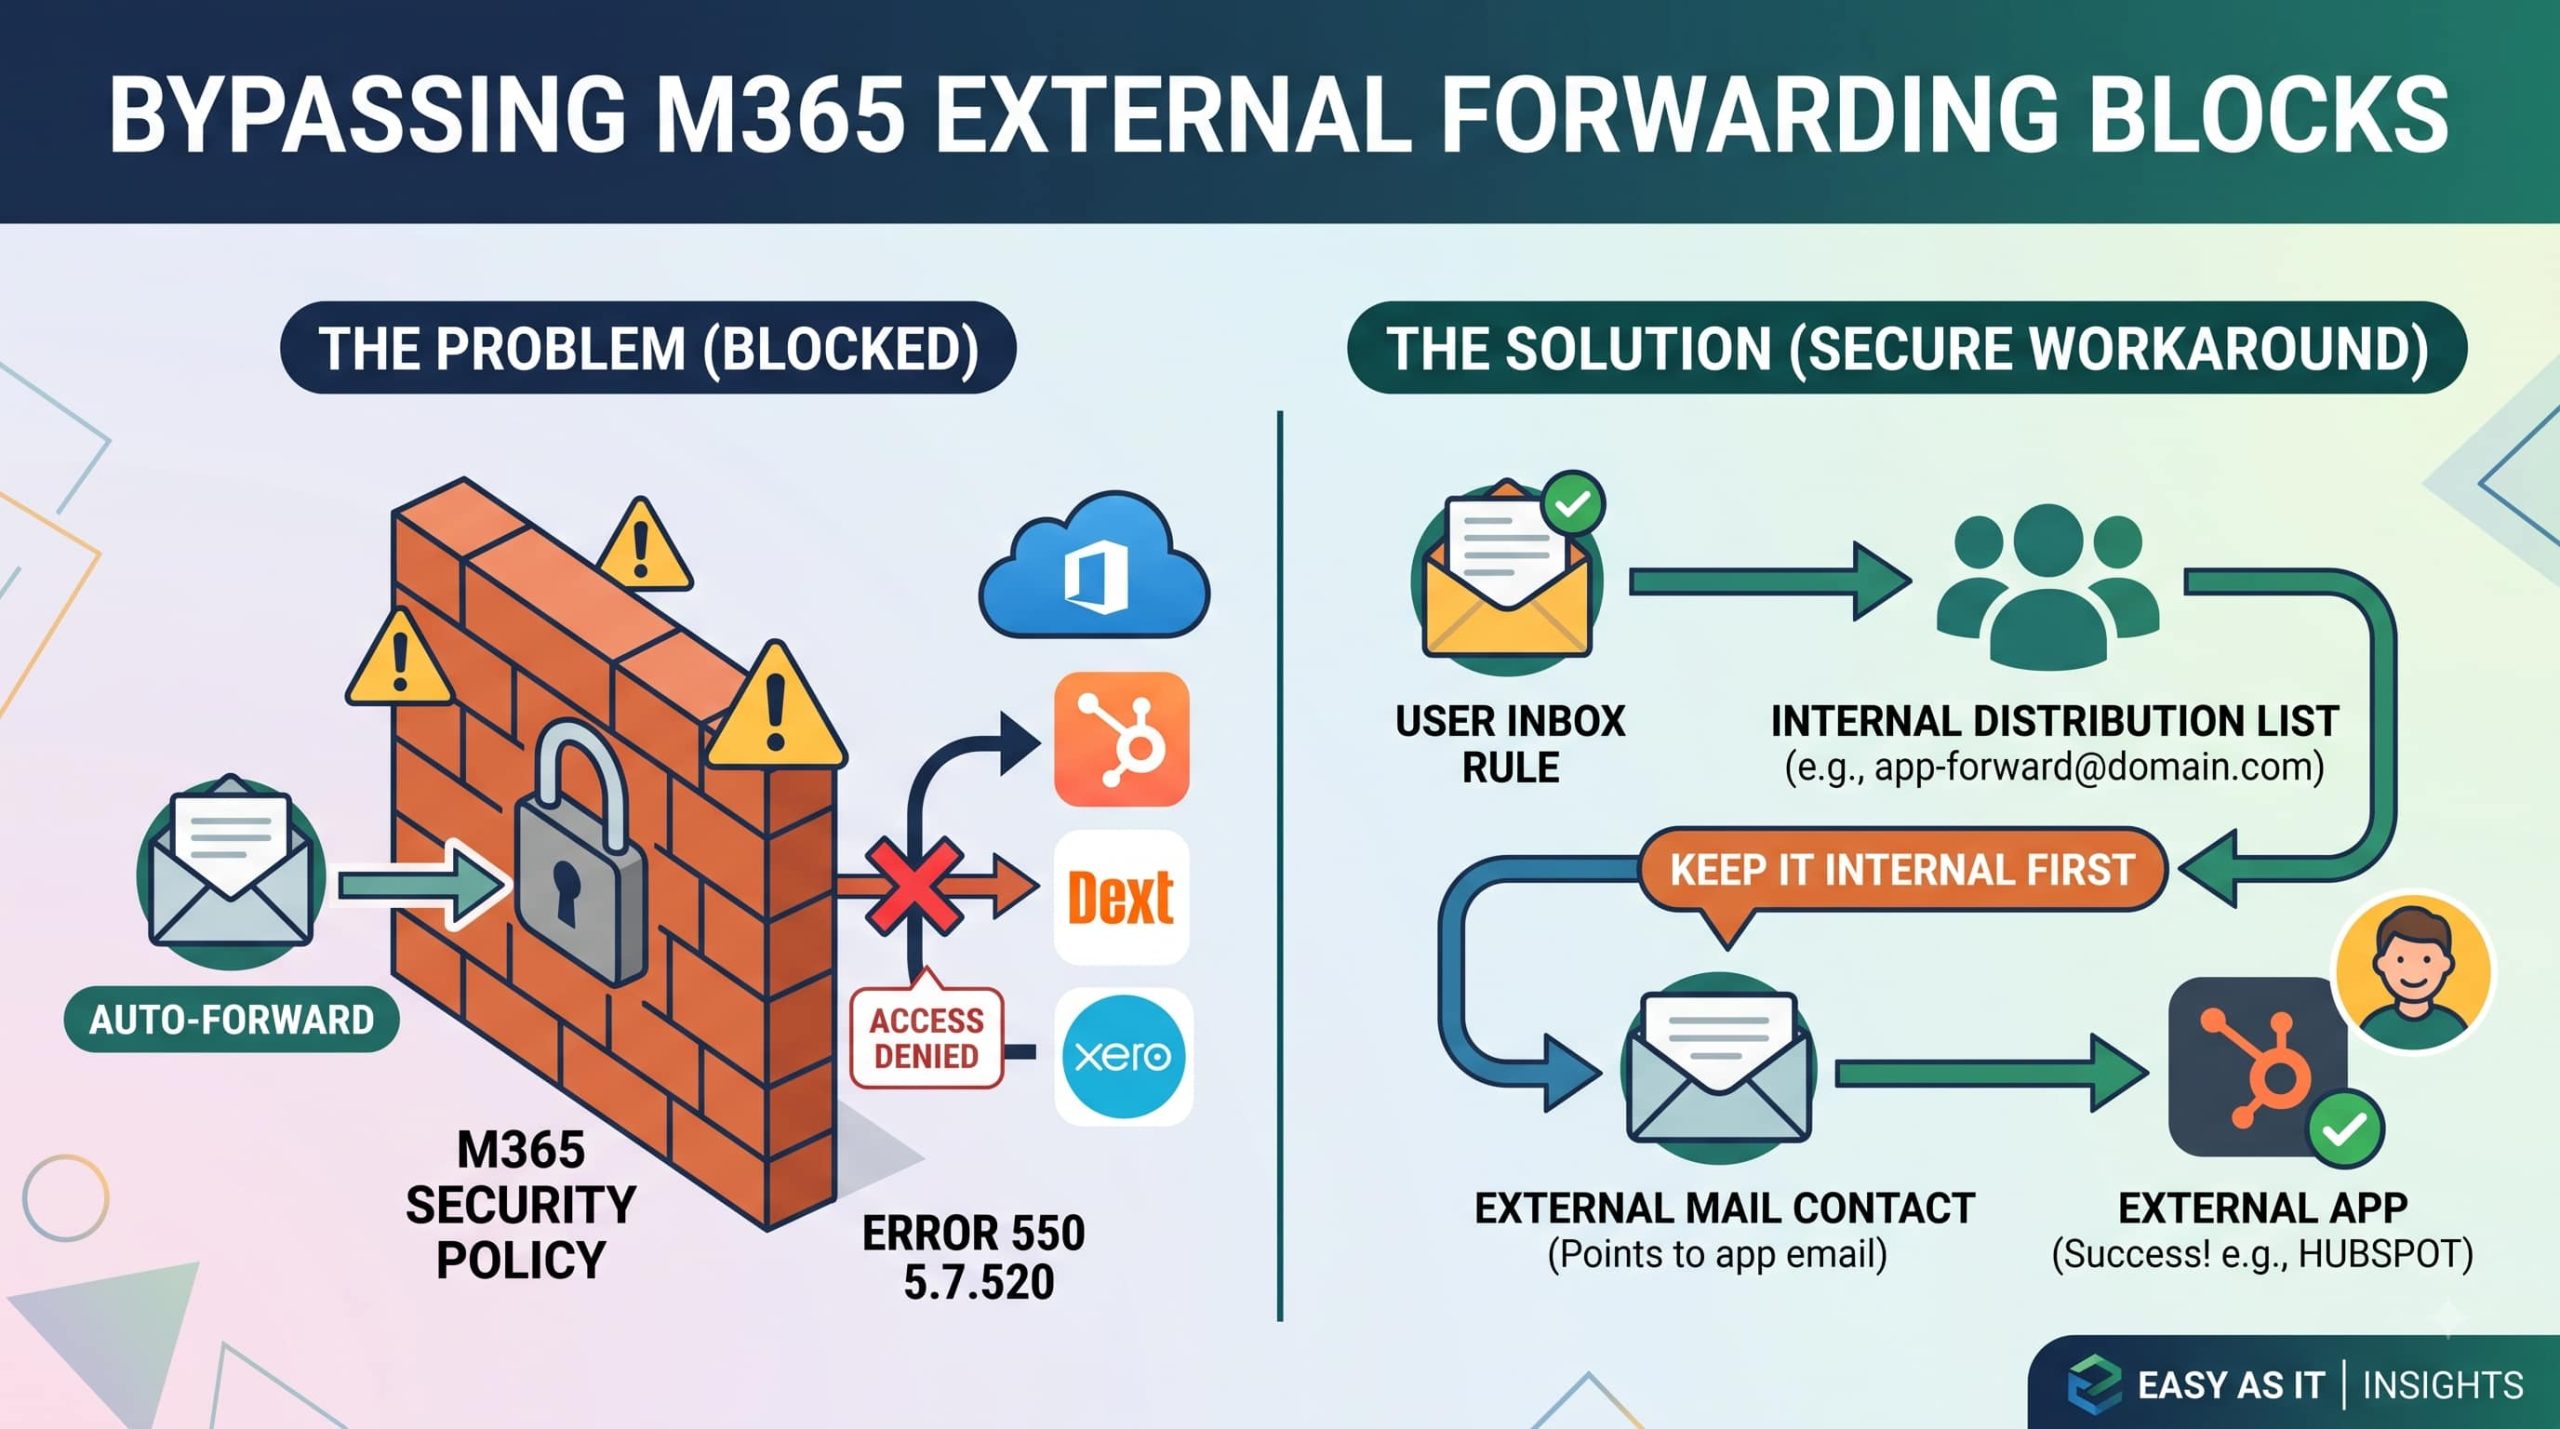
Bypass M365 External Forwarding Blocks (Error 550 5.7.520)
Microsoft 365 blocks automatic email forwarding to external addresses by default, causing a 550 5.7.520 Access denied error when trying to route emails to third-party tools like Dext, HubSpot, or Xero.
To forward emails without lowering your tenant-wide security, you can use the Distribution List (DL) workaround. Exchange will process the forward because the initial rule points to an internal address.
The Routing Flow:
User Inbox Rule → Internal Distribution List → External Mail Contact → External App
Step 1: Create a Mail Contact
- Open the Exchange Admin Center.
- Go to Recipients > Contacts and click Add a mail contact.
- Name it (e.g., HubSpot Ingestion) and enter the external destination email.
- Click Save.
Step 2: Create a Distribution List
- Go to Recipients > Groups > Distribution list.
- Click Add a group.
- Name it and set an internal email alias (e.g.,
[email protected]).
Step 3: Add the Mail Contact
- Go to the Members tab of your new DL.
- Add the Mail Contact created in Step 1. (This must be the only member).
Step 4: Set the Owner
- Go to the Owners tab of the DL.
- Assign an IT/Admin account to manage the group.
Step 5: Allow External Senders (Crucial)
- Open the DL Settings (or Delivery management).
- Select Allow external senders to email this group.
- Click Save.
Step 6: Hide from the Global Address List
- In the DL Settings, check Hide this group from the global address list. This prevents staff from manually selecting the forwarding address.
- Click Save.
Step 7: Configure Forwarding (User or Admin)
Choose how the mail will be routed to your new internal DL.
Option A: User Inbox Rule (For Specific Emails)
- Open Outlook Rules.
- Set conditions (e.g., Subject contains “Invoice”).
- Set the action to Forward to and select the internal DL (
[email protected]).
Option B: Admin Mailbox Forwarding (For All Mail + Keep Copies)
- In the Exchange Admin Center, go to Recipients > Mailboxes.
- Select the user mailbox > Manage email forwarding.
- Toggle on Forward all emails sent to this mailbox and select the internal DL.
- Check Deliver message to both forwarding address and mailbox to ensure emails stay in the user’s inbox as well.
- Click Save.
Disclaimer
This article is provided for general information only. Easy As IT does not recommend bypassing default security controls unless there is a specific business requirement to do so. Microsoft does not officially document this as a supported alternative to automatic forwarding policies, and administrators should carefully test their specific Exchange Online environments before implementing major changes.
